Scheduler
The scheduler functions like a standard irrigation controller but is integrated into Omnia for easier setup and management (image 1.1). Use it to automate station run times and restrict operation during specified times of day. Configure schedules, enable/disable events, and set time windows so the station only runs when permitted.
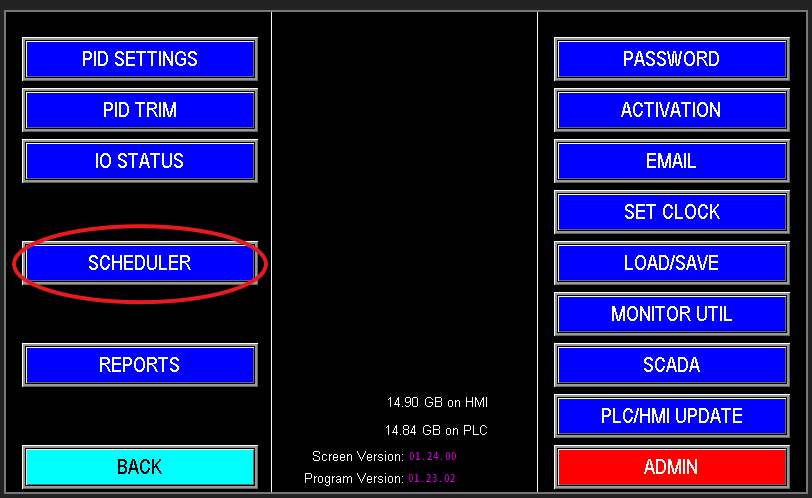
1.1 Scheduler
The scheduler provides flexible, customizable automation to control when the station runs and which pumps operate. There are three identical scheduler profiles to configure separate schedules as needed. The scheduler interface (image 1.2) is organized into several sections to simplify setup and ensure precise control of station runtime and pump selection.
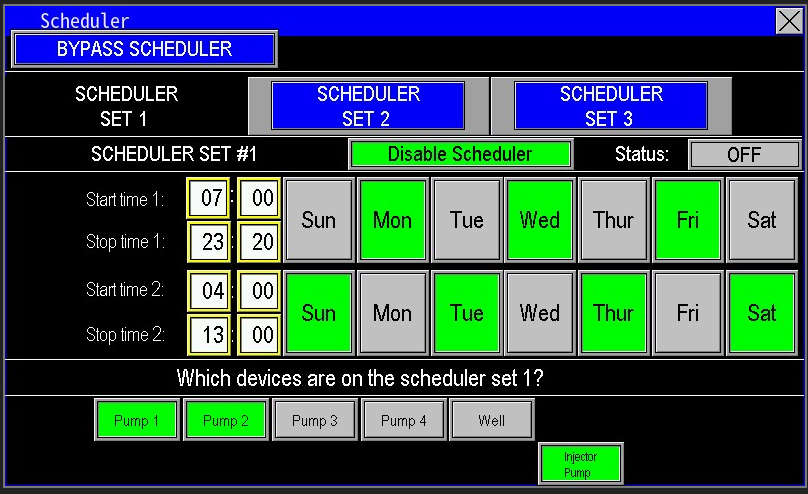
1.2 Scheduler
Scheduler Select
This section allows you to choose among multiple predefined schedules (image 1.3). If operational rules change—for example, permitting additional watering—select an alternate scheduler and configure the new run times. You can also use this area to schedule auxiliary functions, such as operating a water feature at specified times.

1.3 Scheduler select
Scheduler Status
This section displays the currently selected schedule, its enabled/disabled state, and its real‑time status (image 1.4). For example, if Scheduler #1 is selected and enabled but shows “Off,” it is awaiting its configured start time and will activate according to its schedule when that time is reached.

1.4 Scheduler Status
Scheduler run time setup
Use this section to configure the exact times the station will run—similar to programming a sprinkler controller. Before configuring, verify the HMI date and time are correct, as the scheduler operates from the panel clock (image 1.5).
- Each scheduler supports two start times per day.
- Select the desired start times and the days of the week the schedule should run.
- If more than two daily start times are required, use the additional scheduler profiles to add
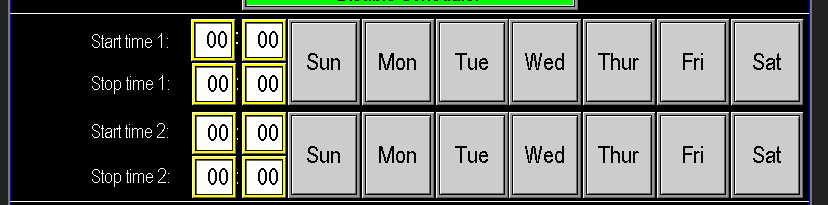
1.5 Time and Days
Devices to run
Select which pumps should run for the configured schedule (image 1.6). For each scheduler cycle, choose the device(s) (e.g., Main1, Main2, Jockey) that will operate. For example, if a single main pump can supply a zone, select only that pump for the schedule. If no devices are selected, no pumps will run for that scheduled event. Ensure device selections are configured during station setup.

1.6 Devices to run
Scheduler Example
Example Scheduler Configuration (Images 1.7–1.8)
Scheduler 1
- Enabled, Status: Off
- Start Time 1: 16:57 — End Time: 23:20 on Mon, Wed, Fri
- Start Time 2: 04:00 — End Time: 13:00 on Sun, Tue, Thu, Sat
- Devices: Jockey, Pump 1, Pump 2
Scheduler 2
- Active now
- Different start/end times and days for a smaller zone
- Devices: Pump 3, Pump 4 (jockey and Pumps 1–2 not selected)
Note:
- Start and end times must be within the same calendar day. A schedule that spans midnight will stop at 00:00 of the start day (e.g., 20:00 → 03:00 will run 20:00–00:00 only), so plan schedules accordingly.
1.7 Scheduler 1 |
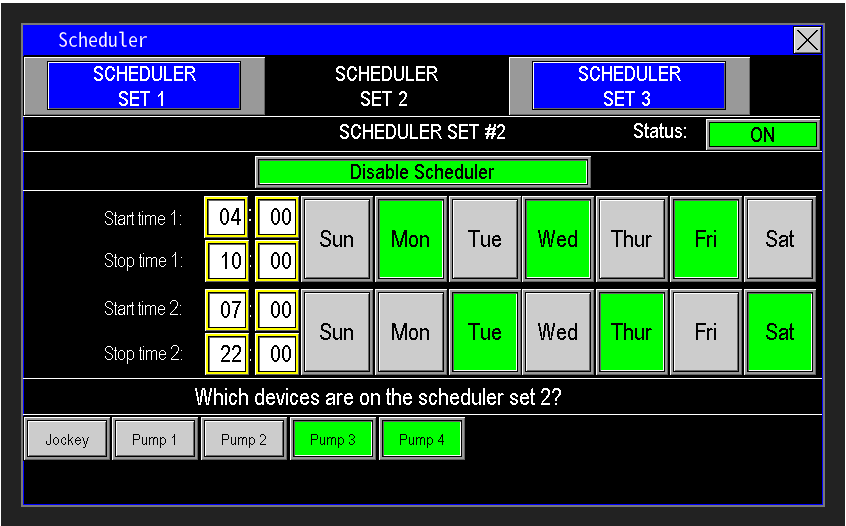 1.8 Scheduler 2 |
Bypass Scheduler
The Bypass Scheduler feature allows temporary override of an enabled schedule without disabling or editing it (image 1.9). When the scheduler is active but not calling for pumps, press Bypass Scheduler to open the bypass dialog. Select the scheduler to override and specify the bypass duration.
Example image 2.0: Bypassing Scheduler #1 for 3 hours will permit pump operation for that interval while leaving the original schedule unchanged.
 1.9 Bypass Button |
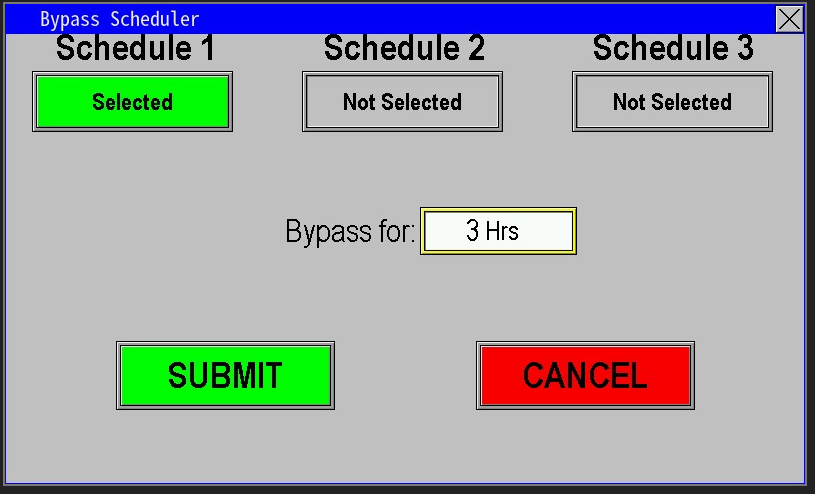 2.0 Bypass screen |